Explain zooming and panning image in Adobe Photoshop?
https://www.computersprofessor.com/2019/05/explain-zooming-and-panning-image-in.html
Explain zooming and panning image in Adobe Photoshop?
Ø Zooming Image:
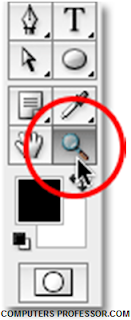
ü To zoom an image, click zoom tool at the tool box.
ü In the options bar, you
can see zoom in and zoom out icons.
ü Click the zoom in icon.
ü Select the area which you
want to zoom in the picture.
ü After that you can saw
your selected part of the image is looks big.
Ø Panning Image:
When you're zoomed in on an image, you'll often want to drag the image
around inside the document window to check out other areas of the image at the
same zoom level. This is commonly known as "panning", and we can pan
images around inside the document window using the Hand Tool which you'll find
next to the Zoom Tool in the Tools palette.


